So first off, I picked up this Origami Paper at Hobby Lobby a few months back when I made my first ball. I want to say this package was $4.99. They have the smaller 4inch size and larger pieces, the choice is really yours.

Pick a sheet. Whee... we'll do these bubbles. Yay.

Fold diagonally from one corner to the opposite corner.

Folding paper is a science ya'll. It should look like this.

Take the corner, and fold up to the opening.

Repeat on the other side.

Look like this? Good.

Open up each "wing" that you folded up.

Flatten it.

Repeat on both sides.

Should look like this.

Fold down the corners.

Repeat... both sides. Yay.

Fold back into our original square.

Like this.

Now... bring both... sides inwards... roll it and connect them.

Repeat 4 more times.

Hot glue. Careful. Hot glue... is... hot. (Yet, I burn myself everytime I use a gun)

Hold it a minute, repeat with all petals, and then add a line of glue along the edge of one.

Stick on another petal.

Another.

More glue if needed and stick on the last petal. Should look like this. Oooh. Pretty. At this point? If you wanted? You could slip in some florist wire at the bottom and make a bouquet of flowers instead!

We're not going to do that today though. Fix and adjust any of the petals to look fuller. Now the hard part...

Repeat all above steps and make 11 more flowers. (That's 55 petals) Whee!

Ooh and now we have 11 flowers. We're almost there.

Start at the middle of one of the petals. Add a line of glue.

Add a flower.

Add another all connected to that one line of glue. See how the petal tips come together?

Pinch... glue...

Like so. Continue adding your flowers, gluing them where the center of the petals touch.

When you get about here stop for a minute. This is roughly half a flower.

Add a loop of ribbon. Yay glue.

Ok. I apparently didn't get a picture of me putting the last flower in. When you get to this point you want to gently squish and form your flowers to "tighten" up your spot so that your last flower fits perfectly in this spot. Put glue on just the petal intersections like you have been doing and fit in your last flower.

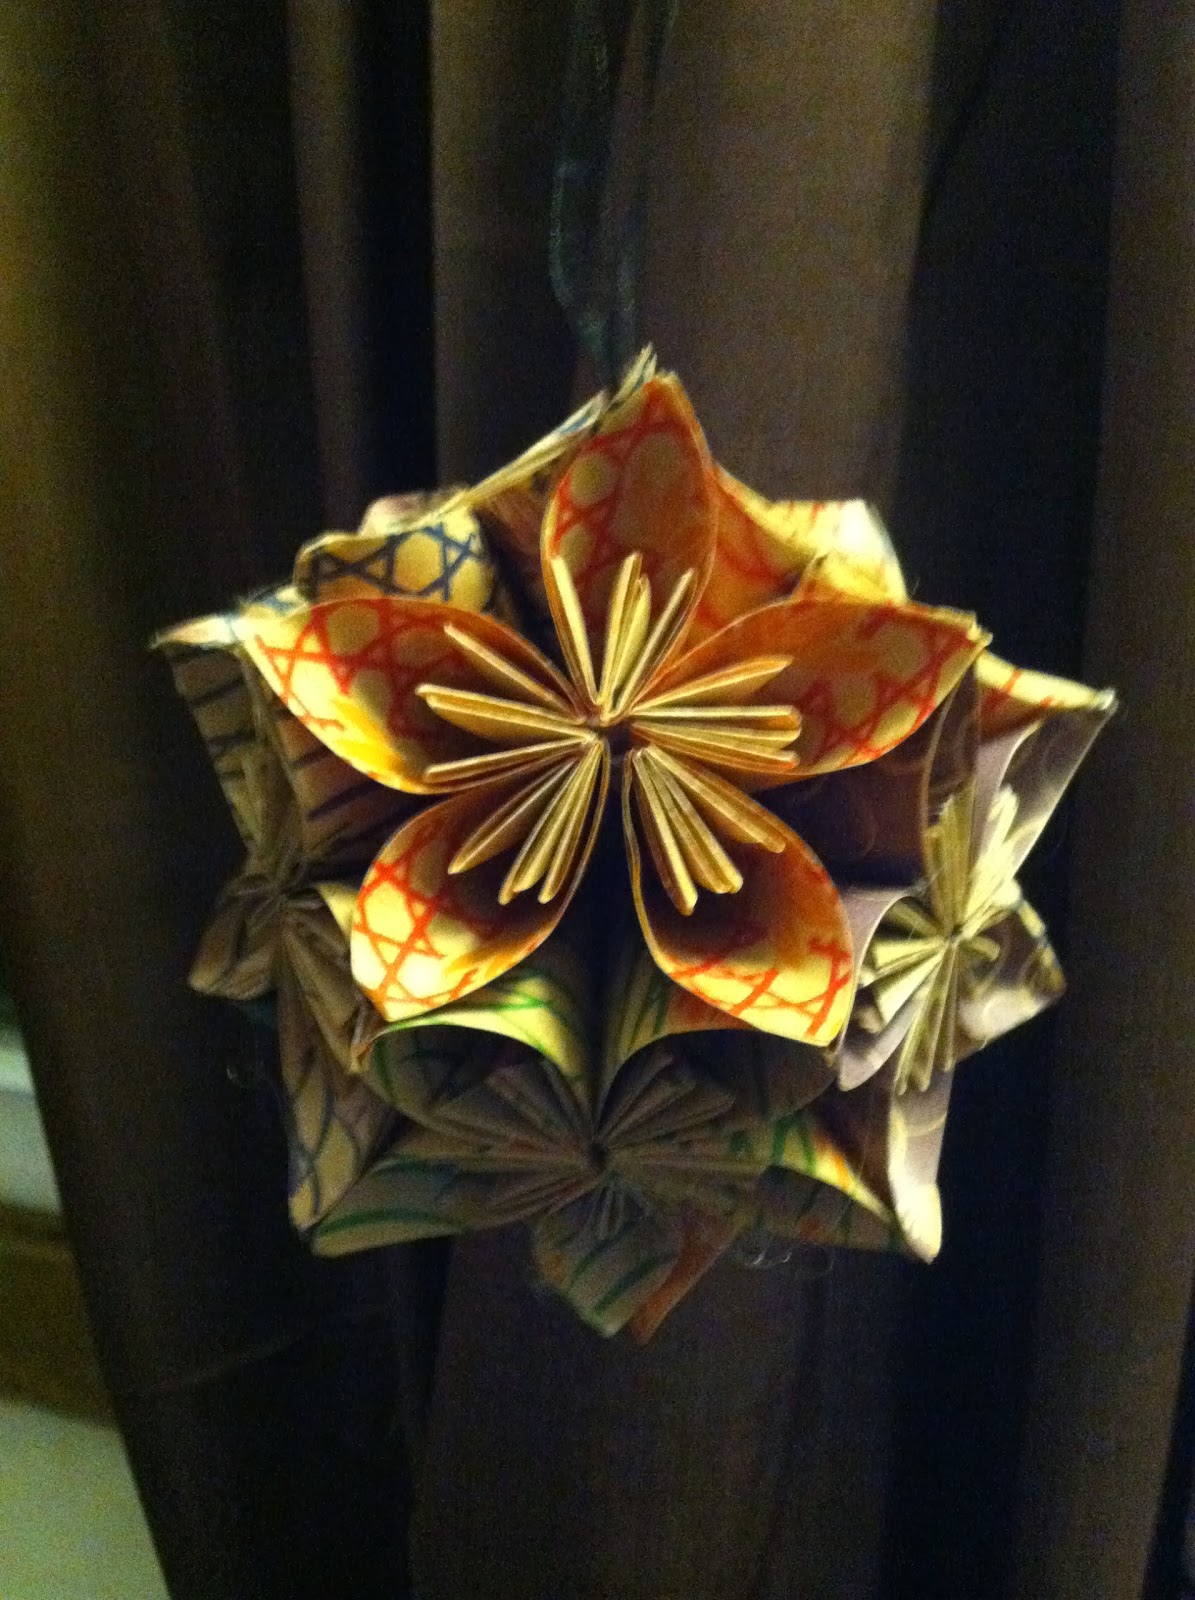
And finished project!!! This one will be going to my friend S.Happy Valentines. I didn't forget. I just. I didn't do a hearty post. Ang did that for you a bit ago! Yay. *cough*

No comments:
Post a Comment